

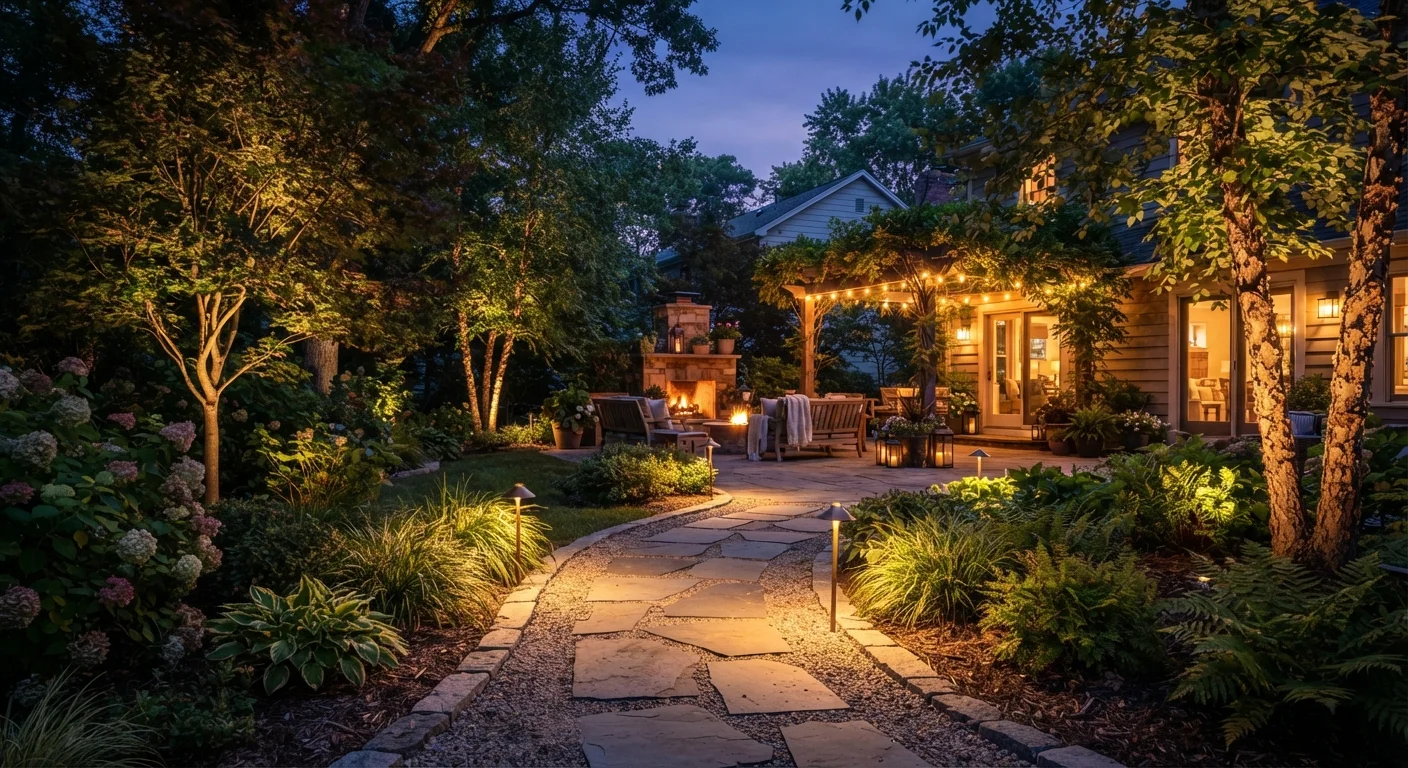
Key Takeaways
- Lighting placement matters more than fixture count - zones define how a yard actually functions after dark.
- Pathway and step lighting serve safety first, then ambiance - both goals are achievable with the right approach.
- Low-voltage LED systems offer flexibility and energy efficiency for most residential landscape lighting needs.
- Uplighting and downlighting create dramatically different moods from the same outdoor spaces.
- Over-lighting a yard creates glare and light pollution; restraint and layering produce better results.
Why Outdoor Lighting Deserves a Real Plan
Most homeowners add outdoor lighting reactively - a floodlight here, a string of solar stakes there - and end up with a yard that's either too bright in the wrong places or too dark where it counts. A more deliberate approach treats the yard the way interior designers treat rooms: as a space with distinct zones, each with its own lighting purpose.
The layering principle that interior renovators use applies outdoors just as effectively. Ambient light, task light, and accent light each play a role, and getting those roles right depends on understanding where people move, pause, cook, or simply look from a window. The seven approaches below address the most common gaps in residential outdoor lighting - not by adding more fixtures, but by placing them with intention.
Start With a Nighttime Walk-Through
Before buying a single fixture, walk your yard after dark with a flashlight. Note where you instinctively want light - steps, gate latches, the path from driveway to door - and where you want visual interest. This simple audit often reveals that fewer, better-placed fixtures will outperform a larger collection installed without a plan.
Seven Approaches That Change How You Use Your Yard
Define Your Pathways with Low-Profile Step Lighting
Steps, grade changes, and entry paths are the first priority in any outdoor lighting plan. A misstep on an unlit stair is a genuine hazard, and low-profile step lights - fixtures recessed into risers or mounted flush with adjacent walls - solve the problem without harsh floodlighting. The goal is to illuminate the edge of each tread clearly, not to flood the area with brightness. Warm white LEDs (around 2700-3000K color temperature) tend to feel welcoming without impairing night vision.
Step lights solve the most common outdoor safety gap without resorting to harsh floodlighting.
Use Uplighting to Give Trees and Structures Presence
Uplighting - placing fixtures at ground level aimed upward - is the technique most responsible for that dramatic after-dark look in well-landscaped yards. Positioned at the base of a mature tree, an uplight casts the canopy into relief and creates a natural focal point visible from inside the home. The same approach works on architectural features: a stone wall, a pergola column, or a prominent shrub. Keep the beam narrow and the fixture hidden; the light should read as coming from the landscape itself, not from an obvious source.
Uplighting turns a mature tree or stone wall into a focal point visible even from inside the house.
Layer Downlighting for Usable Patio Illumination
Downlighting from an overhead structure - a pergola, a covered porch ceiling, or a well-positioned tree branch - mimics natural moonlight and creates soft, even coverage over a seating or dining area. This is preferable to a single bright fixture centered above a table because it eliminates harsh shadows and allows conversation without squinting. Low-voltage LED downlights mounted at consistent heights produce the most natural effect. On a pergola, spacing fixtures roughly every 6-8 feet gives reliable coverage without over-brightness.
Overhead downlighting from a pergola creates even, shadow-free coverage that a single ceiling fixture never achieves.
Mark Boundaries with Path Lights - Sparingly
Path lights along a garden walkway serve both wayfinding and aesthetics, but the runway effect - identical fixtures evenly spaced down both sides of a path - often looks institutional rather than inviting. A more effective approach spaces fixtures irregularly on a single side, or alternates sides, allowing the light pools to overlap gently. Fixtures set at a lower profile (12-18 inches tall) keep glare out of eye level and let plantings remain the visual focus. Path lighting works especially well when it highlights a well-maintained garden bed edge running alongside the walkway.
Irregular, single-side spacing avoids the runway look and keeps garden plantings as the visual focus.
Add Task Lighting to Outdoor Kitchen and Grill Areas
Any outdoor cooking zone benefits from dedicated task lighting - not a floodlight, but a focused source aimed at the preparation surface. Undercabinet LED strips on an outdoor kitchen island, or a small adjustable fixture mounted on a nearby post, keeps the cook from working in their own shadow. Weather-rated (UL-listed for wet or damp locations) fixtures are essential here; the same applies to any electrical connections in the area. For grill setups without a built-in structure, a nearby post or pergola beam gives a stable mounting point without running new conduit.
A focused task light over the grill area keeps cooks from working in their own shadow all evening.
Use Warm Color Temperature Throughout for Visual Cohesion
Color temperature - measured in Kelvins - determines whether outdoor light reads as warm and inviting or cool and clinical. For residential landscapes, 2700K to 3000K is generally the right range: it flatters plant foliage, skin tones, and natural materials like wood and stone. Mixing color temperatures across a single yard creates visual incoherence even when individual fixtures look fine in isolation. When expanding an existing system, check the Kelvin rating of current fixtures before purchasing additions. Consistent color temperature is one of the simplest ways to make a yard feel professionally designed.
Consistent warm color temperature (2700-3000K) across all fixtures is what makes a yard feel cohesive at night.
Consider Timers and Zones to Control the Full System
A low-voltage transformer with built-in timer capability lets you run pathway and security lighting on one schedule and accent lighting on another - so decorative uplighting isn't burning through the night when no one is using the yard. Dividing fixtures into zones also makes troubleshooting easier: if one circuit has a problem, the rest of the yard stays lit. Most modern low-voltage systems are designed for DIY installation up to the transformer; any work involving line-voltage connections or new conduit runs should involve a licensed electrician. Check local permit requirements before adding new outdoor electrical infrastructure.
Zoned timers let pathway and accent lights run different schedules, cutting energy use without sacrificing safety.
Low-Voltage vs. Line-Voltage Systems
Most residential landscape lighting runs on 12-volt low-voltage systems, which are safer to handle and easier to modify than standard 120-volt (line-voltage) wiring. Low-voltage systems use a transformer that plugs into a standard outdoor outlet. Line-voltage outdoor lighting - used for security floodlights or hardwired post lanterns - typically requires a licensed electrician and may need a permit depending on your local building code. Always verify local requirements before starting any new outdoor electrical work.
Putting It Together Without Overdoing It
The most common outdoor lighting mistake isn't under-lighting - it's overbuilding. Too many fixtures aimed in competing directions create glare rather than warmth, and scatter light where it doesn't serve any purpose. A good outdoor lighting plan starts with the activities and pathways that matter most, then layers in accent and aesthetic elements once the functional needs are covered.
If your yard includes defined planting areas, consider how lighting works alongside what's already there. A mix of perennial and annual plants gives you reliable structure to uplight across seasons. Similarly, hardscape features like patios and pathways provide natural anchors for fixture placement and electrical planning. Build your lighting scheme around what's already working in the yard - it'll feel more cohesive and require fewer adjustments over time.