

Key Takeaways
- Demolition always comes first - before any new materials are ordered or staged.
- Rough plumbing and electrical must be inspected and approved before walls are closed up.
- Tile is installed after waterproofing but before fixtures are set, not the other way around.
- Final fixture installation and trim work are the last phase, protecting finished surfaces from damage.
- Skipping or reversing steps typically forces expensive tear-out and rework.
What you will need
Why Sequence Is the Real Project Management Tool
A bathroom remodel touches more trades - plumbing, electrical, tile, carpentry, painting - than almost any other room of comparable size. Each trade depends on the one before it being complete and correct. When the order of work breaks down, the result isn't just inefficiency: it's tile that has to come up, drywall that gets opened, or fixtures that arrive before the walls are ready to receive them.
The sequencing logic professionals follow exists for practical reasons. Rough work must be inspected before it's hidden. Substrates must be prepared before finish materials go down. Paint and tile must be complete before fixtures are installed, because fixtures are the most damage-prone elements on the job. Understanding this logic helps homeowners coordinate trades, catch scheduling conflicts early, and avoid the budget overruns that come from rework.
This guide follows the sequence that licensed contractors use on full bathroom renovations. Smaller scope projects - like a tub surround refresh or a vanity swap - share the same principles even if not every step applies.
What you will need
Tools and Materials You'll Need
Beyond finish materials like tile, fixtures, and paint, a bathroom remodel requires a specific set of process tools and substrates. Having these on hand before each phase begins prevents the costly downtime of mid-project supply runs. Note that electrical and plumbing rough-in work requires licensed tradespeople in most US jurisdictions - the tools for those phases belong to your hired professionals, not a DIY checklist. For a fuller discussion of which scopes to self-perform versus hire out, see our guide on DIY vs. professional installation.
Moisture meter
Checks subfloor and wall framing for hidden water damage during demolition before new materials are installed.
Level and straightedge
Verifies that substrate surfaces are flat and plumb before tile installation begins.
Waterproofing membrane and seam tape
Applied to wet-area walls and the shower pan before tile to prevent water intrusion behind finished surfaces.
Cement board (or tile backer)
Provides a dimensionally stable, moisture-resistant substrate for floor and wall tile in wet areas.
Tile saw (wet saw)
Makes precise cuts around fixtures, corners, and niches during tile installation.
Caulk gun and silicone sealant
Seals transitions at corners, fixtures, and between dissimilar materials at the end of the project.
The Step-by-Step Remodel Sequence
Follow these steps in order. Resist the urge to overlap phases before predecessors are complete - the time saved is rarely real, and the rework risk is significant. If you're planning a larger project that also involves adding space, it's worth reading about room additions versus finishing existing space before committing to a scope.
Permits Are Not Optional
Most bathroom remodels that move or add plumbing, electrical circuits, or change the layout require permits in the US. Working without them can create serious problems when selling the home, affect your homeowner's insurance coverage, and may require demolition to satisfy an inspector. Check with your local building department before any work begins.
Complete full demolition and assess the substrate
Strip the bathroom down to framing: remove fixtures, vanity, toilet, existing tile, drywall, and flooring. Do not work around anything you plan to replace. Once surfaces are exposed, use a moisture meter to check framing and the subfloor for rot or water damage. Any compromised wood must be sistered or replaced before proceeding - patching over a soft subfloor is one of the most common and costly mistakes in bathroom work.
Repair structural elements and subfloor
Once demolition reveals what you're working with, address any structural issues. Replace rotted or sagging subfloor sections, reinforce joists if needed, and confirm the floor can support the planned tile weight. A solid, deflection-free subfloor is the foundation of every other step - tile installed over a bouncy floor will crack at the grout lines no matter how well it's set.
Rough-in plumbing
This is the phase where a licensed plumber moves or installs supply lines, drain lines, and shower valve bodies. All rough plumbing must be in place before walls are closed. If you're relocating a toilet, moving the shower drain, or adding a second sink, it happens here. Changes after walls are tiled are extremely expensive - this is not the step to defer decisions.
Rough-in electrical
A licensed electrician installs new circuits, GFCI outlet rough-ins, exhaust fan wiring, and any radiant floor heating leads at this stage. Bathroom electrical work is heavily regulated in the US - all outlets near water sources require GFCI protection, and many jurisdictions require a dedicated circuit for certain fixtures. Work with a licensed electrician and do not close walls until the rough-in passes inspection.
Schedule and pass rough inspections
Before a single piece of drywall or backer board goes up, your rough plumbing and electrical work must be inspected and signed off by the local building authority. This step is non-negotiable when permits are required. Inspectors need to see the work while it's exposed. Skipping this step and closing walls risks being ordered to open them back up - at your expense.
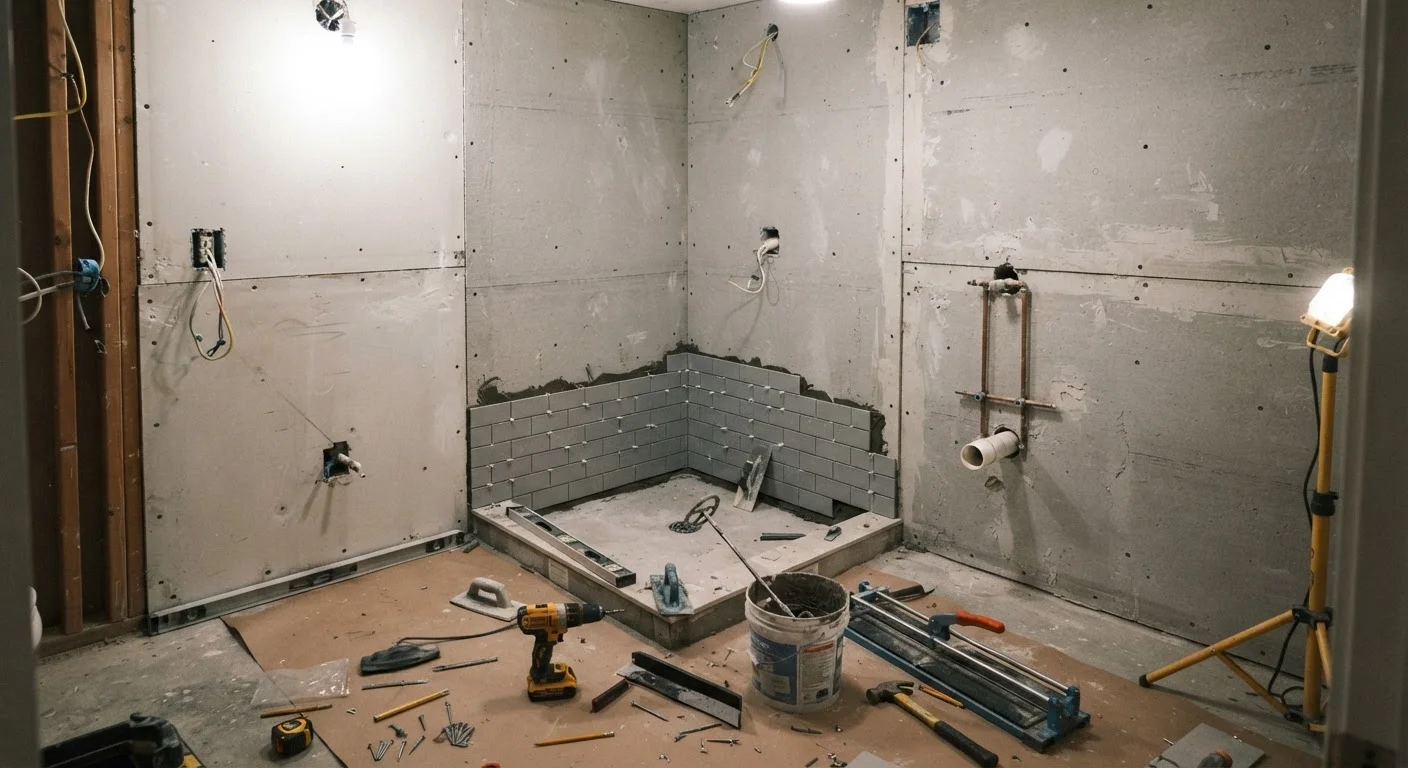
Install cement board and waterproofing
After inspections are cleared, hang cement board (or an equivalent tile backer) on shower and tub surround walls and over the subfloor where tile will go. Apply a waterproofing membrane to all wet areas - this includes the shower pan, lower walls in the shower, and any niche cavities. Tape and seal seams and transitions carefully. Waterproofing is invisible once tile goes up, but it's what determines whether the remodel lasts 5 years or 25.
Set tile on floors and walls
Tile installation begins on the floor first, then moves to walls. Start layout from the visual center of the space - not the corner - to avoid awkward slivers at prominent sight lines. Set tiles using the appropriate thinset mortar for your substrate and tile type, back-buttering large-format tiles to ensure full coverage. Allow the thinset to cure fully (check manufacturer specs) before grouting. Grout color and joint width have a substantial effect on the finished look - choose deliberately.
Install drywall, prime, and paint
Outside the wet zone, hang moisture-resistant drywall (sometimes called greenboard, though there are multiple product options), tape, mud, and sand seams. Paint before fixtures are installed - it's significantly faster and cleaner to roll and cut in on bare walls than to tape around trim and hardware. Use a paint rated for high-humidity environments in bathroom applications.
Set finish plumbing fixtures
With tile cured and paint dry, the plumber returns to set finish fixtures: toilet, faucets, shower valve trim, tub spout, and any other supply connections. This is also when the vanity top and undermount sink are set. Installing fixtures after tile and paint protects finished surfaces from trade damage and avoids time-consuming cleanup of grout haze or paint splatter on chrome or brushed finishes.
Complete electrical finish work and trim carpentry
The electrician installs outlet covers, switch plates, exhaust fan grilles, and light fixtures. Baseboard, door casing, and any built-in millwork go in at this stage as well. This is the final phase - everything installed now is on top of finished surfaces. Work carefully and protect tile and paint from scuffs. Final caulking at all transitions (tub-to-tile, tile-to-vanity, base trim-to-floor) completes the moisture barrier and gives the bathroom a finished, professional appearance.
Photograph Everything Before Closing Walls
Once drywall and tile go up, the location of every pipe, wire, and blocking becomes invisible. Take clear photos of all rough work from multiple angles before covering it. These images are invaluable for future repairs, fixture swaps, or if you ever need to trace a leak.
Common Sequencing Mistakes and How to Avoid Them
Even experienced DIYers make predictable sequencing errors. The most common: installing tile before rough inspections are complete, setting a vanity before painting the walls behind it, and caulking with grout instead of silicone at movement joints. Each of these creates either a code violation, a future maintenance headache, or a cosmetic problem that's expensive to fix cleanly.
A second category of error involves timing material deliveries incorrectly. Tile ordered before demo is complete may arrive short if substrate conditions require a layout adjustment. Fixtures delivered too early sit in a construction zone and risk damage. Stagger orders deliberately - rough materials first, finish materials timed to arrive when their installation phase is 1-2 weeks out.
Finally, avoid the temptation to skip caulking as a finishing step. Interior corners in tile, the joint between the tub and floor, and transitions between the tile field and any wood trim are all movement points. Grout cracks at these locations almost universally within a few years. Silicone caulk matched to your grout color handles movement and stays watertight. More renovation beliefs worth examining are covered in our piece on home renovation myths that cost real money.
Don't Order Tile Before Demo Is Complete
It's tempting to lock in materials early, but hidden water damage, out-of-square walls, or subfloor rot discovered during demolition can change your layout or tile quantity significantly. Rough measurements are a starting point - final orders should wait until the substrate is exposed and assessed.